VESC Port Setup and Connection Check
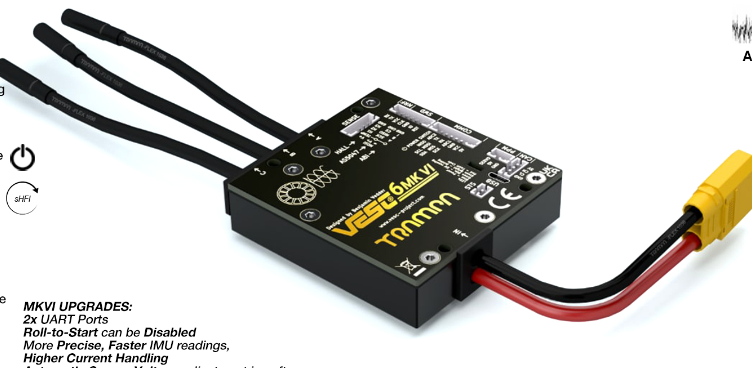
After connecting the VESC to the vehicle, this guide walks through finding and assigning its serial port, then checking the motor, servo, and sensor connections in ROS 2.
1. Find the VESC Port
Option 1. Find the port manually
1
ls /dev/
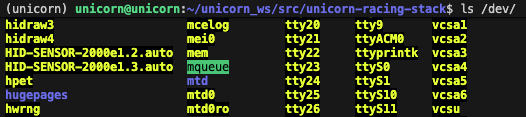
The VESC is one of the ttyACMx devices. If you have multiple USB devices connected, they are named in order such as ttyACM0, ttyACM1.
Option 2. Fix the port to /dev/VESC with a udev rule (and auto permission)
Registering a udev rule so the VESC is always recognized as /dev/VESC means you no longer have to look up the port name every time, even if it changes. This is especially handy when several USB devices are connected together, since the port names won’t get mixed up.
1
2
3
echo 'SUBSYSTEM=="tty", ATTRS{manufacturer}=="STMicroelectronics", SYMLINK+="VESC", MODE="0666"' | sudo tee /etc/udev/rules.d/99-vesc.rules
sudo udevadm control --reload-rules
sudo udevadm trigger
2. Assign the VESC Port
Set the port you found in ~/unicorn_ws/src/unicorn-racing-stack/stack_master/config/CAR/vehicle_config.yaml.
1
2
3
vesc/**:
  ros__parameters:
    port: "/dev/ttyACM0"
If you used the udev rule from Option 2, set
port: "/dev/VESC".
3. Verify the Connection
If you have not built the UNICORN Racing Stack on the car yet, please complete Building the UNICORN Racing Stack on the RaceCar first.
3.1 Launch Low Level
1
ros2 launch stack_master low_level.launch.xml
If you see a log indicating the VESC is paired, as below, it is connected.
1
[vesc_driver_node-1] [INFO] [1782325231.708176116] [vesc.vesc_driver_node]: -=60_MK6=- hardware paired 0

3.2 Check Sensor Data
1
2
3
ros2 topic echo /vesc/sensors/core
# or
ros2 topic echo /vesc/sensors/imu/raw
3.3 Check Motor and Servo Connections
Before driving the motor, always lift the vehicle off the ground so the wheels spin freely. Otherwise the car may suddenly shoot forward and cause an accident.
Spin the motor.
1
ros2 topic pub -r 20 /vesc/commands/motor/speed std_msgs/msg/Float64 "{data: 8000.0}"
If the wheels rotate in the wrong direction, swap any two of the motor’s three cables.
Move the servo.
1
2
3
ros2 topic pub -r 20 /vesc/commands/servo/position std_msgs/msg/Float64 "{data: 0.2}"
ros2 topic pub -r 20 /vesc/commands/servo/position std_msgs/msg/Float64 "{data: 0.5}"
ros2 topic pub -r 20 /vesc/commands/servo/position std_msgs/msg/Float64 "{data: 0.8}"
Conclusion
In this post, we covered how to find and assign the VESC serial port, and how to verify the connection and motor/servo operation in ROS 2.
- Fix the port to
/dev/VESCwith a udev rule, or find it manually withls /dev/. - Set the port in
vehicle_config.yaml. - After running
low_level.launch.xml, verify via the log, the/vesc/sensorstopics, and motor/servo commands.
For LiDAR setup, see Hokuyo LiDAR Setup: Static IP Configuration and Sensor Data Check.