Building the UNICORN Racing Stack on the RaceCar
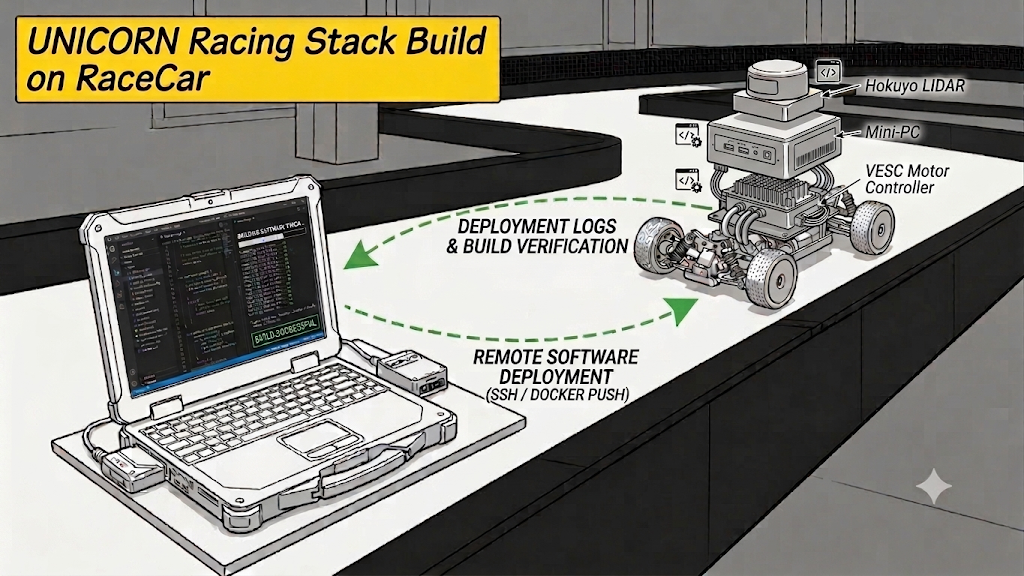
This guide covers the full process of building the UNICORN Racing Stack on the actual vehicle (RaceCar), configuring the LiDAR and VESC, and setting up remote control with CycloneDDS. The full source is available in the UNICORN Racing Stack repository.
For the laptop build (simulation / remote control), see Building the UNICORN Racing Stack for Simulation and Remote Race Control. This post covers the actual vehicle (full build).
0. Conda Setup
If you already have a conda environment, you can skip this step. Otherwise, we recommend installing miniforge.
1
2
3
curl -L -O "https://github.com/conda-forge/miniforge/releases/latest/download/Miniforge3-$(uname)-$(uname -m).sh"
bash "Miniforge3-$(uname)-$(uname -m).sh" && exec $SHELL
conda config --set auto_activate_base false
1. Clone
1
2
3
mkdir -p ~/unicorn_ws/src && cd ~/unicorn_ws/src
git clone --recursive https://github.com/hmcl-unist/unicorn-racing-stack.git
cd unicorn-racing-stack
The submodules must be fetched as well, so always use the
--recursiveoption.
2. Build on the Car (for Racing)
1
./setup_conda_onCar.sh   # the car: full build (everything)
The car build compiles everything — including cartographer, hardware nodes, mapping, and localization — so it takes longer than the laptop build (onLaptop).
3. Set Up the Hokuyo LiDAR
For the LiDAR static IP configuration and sensor data check, see Hokuyo LiDAR Setup: Static IP Configuration and Sensor Data Check.
4. Set Up the VESC
For the VESC port setup and motor/servo connection check, see VESC Port Setup and Connection Check.
5. Set Up CycloneDDS for Remote Control
5-1. Connect to the Same Network
First, connect the car’s onboard PC and the laptop to the same network.
5-2. Match the cyclonedds.xml Interface
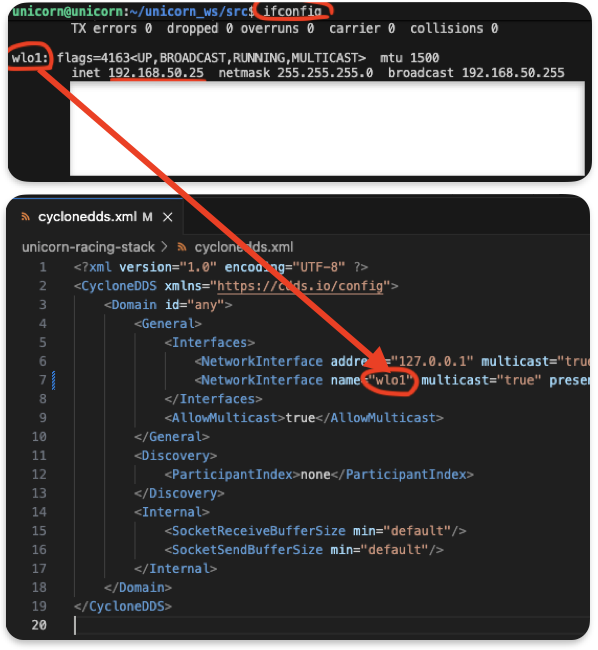
Use the ifconfig command to find your network interface name, then set the interface in cyclonedds.xml accordingly.
If ifconfig is not installed:
1
sudo apt install net-tools
- Choose the correct interface name depending on whether you use a wireless or wired connection.
- You must configure this on both the car and the laptop.
- Config file path:
/home/unicorn/unicorn_ws/src/unicorn-racing-stack/cyclonedds.xml
6. Verify the Remote Connection
Launch low-level on the car (onCar).
1
ros2 launch stack_master low_level.launch.xml
Check that the topic is received on the laptop (onLaptop).
1
ros2 topic echo /scan
If the /scan data shows up on the laptop, the remote connection is working.
Conclusion
In this post, we covered building the UNICORN Racing Stack on the actual vehicle, along with sensor setup and remote control.
- Full car build with
setup_conda_onCar.sh - See the dedicated guides for Hokuyo LiDAR setup and VESC setup
- Remote car–laptop connection via CycloneDDS
To validate in simulation before deploying to the real car, see Building the UNICORN Racing Stack for Simulation and Remote Race Control.